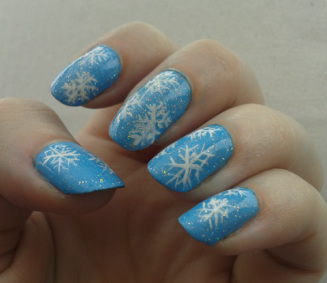
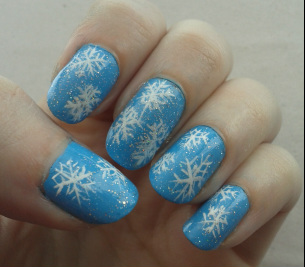
How to do .... snowflake Christmas nails!
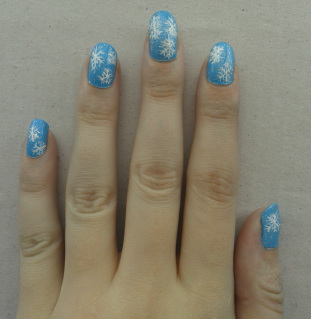
So here is my second Christmas Manicure! This time I have gone for simple pretty snowflakes. They are hand painted and because I found them pretty simple to do, I thought I would share my tutorial of them with you! You don't need many polishes for this at all which is great! Read on to see how you can create this cute Christmas design. :)
|
|
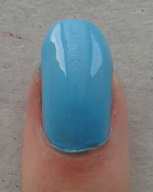
Nail polishes used: Barry M Nail Paint in Blueberry Ice Cream
Models Own Nail Art Pen in White
Barry M Nail Paint in Diamond Glitter
Sally Hansen Insta-Dri Top Coat
Models Own Nail Art Pen in White
Barry M Nail Paint in Diamond Glitter
Sally Hansen Insta-Dri Top Coat
And .... begin!
|
Step 1. Paint your nail in Barry M Blueberry Ice Cream (or any colour of your choice, of course!) |
|
|
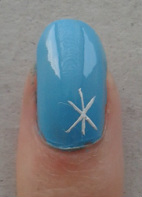
Step 2. Using a paintbrush, or any nail art striper pen, draw a star shape. I used a Models Own Nail art pen and created the cross first, then I painted in the line straight down the middle. |
|
|
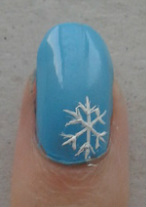
Step 3. Next, using your nail art pen, draw small branch like lines going out from just below the top of each line. It should look something like the picture on the right. The lines don't have to be perfect as it adds to the flaky effect! :)
You can finish your snowflake here if you are happy with it, or you can make it look fuller by following the next step. |
|
|
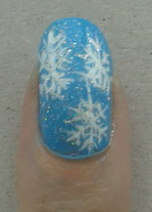
Step 4. Repeat step 3 but this time, paint in the branch like lines near to the bottom of each line. This will make the snowflake look fuller. You can't really see the lines that much as the snowflake is only small, but it makes the snowflake look a lot more realistic. |

|
|
Step 5. Now if you choose, paint on some other snowflakes. Finish by going over the design with a light glitter top coat. This will add sparkle to the snowy effect. I used Barry M in Diamond Glitter as it's a very light polish which doesn't look too messy and it's great for a christmassy feel!
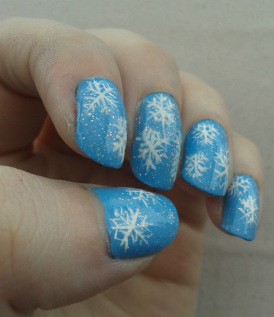
Finish with a top coat and a tidy up and you're done! :D |
|
|
|
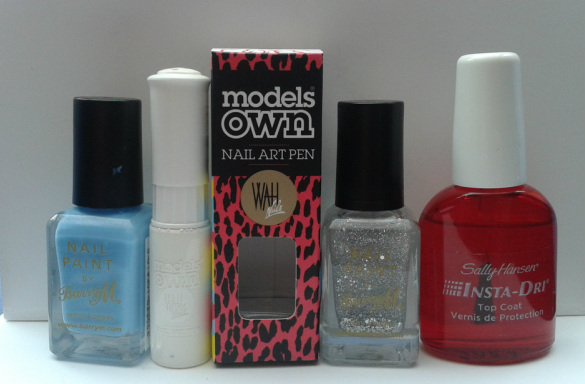
(L,R) Barry M Nail Paint in Blueberry I/C, Models Own Nail Art Pen in White, Barry M Nail Paint in Diamond Glitter, Sally Hansen Insta-Dri Top Coat
Thank you for reading this tutorial!
I hope it inspires you to create your own Snowflake Christmas Nails!
Please feel free to leave any comments and suggestions below :)
I hope it inspires you to create your own Snowflake Christmas Nails!
Please feel free to leave any comments and suggestions below :)
HTML Comment Box is loading comments...
