Matte Nails!
barry m matte varnish
|
|
Overview
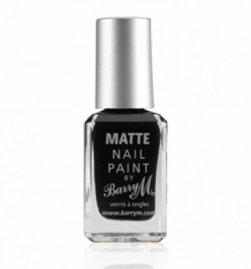
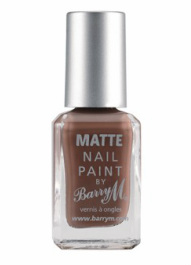
Barry M Matte Nail Varnish. Love love love LOVE it! At first, I was a bit sceptical about it at as I didn't think it would turn out too great because the price is a bit low for properly working Matte Nail Polish, but I went ahead anyway and bought 2 pots of the stuff. I picked up 'Espresso' which is a Matte Black and 'Mocha' which is a mud brown kind of colour.
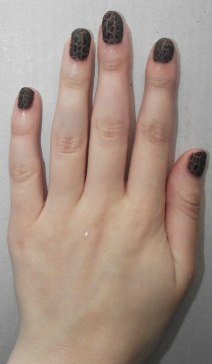
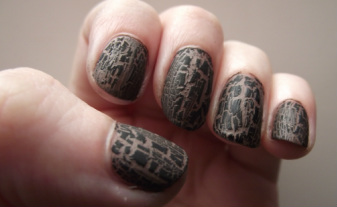
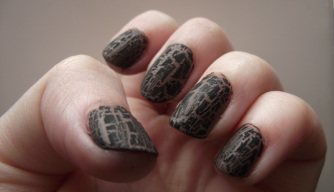
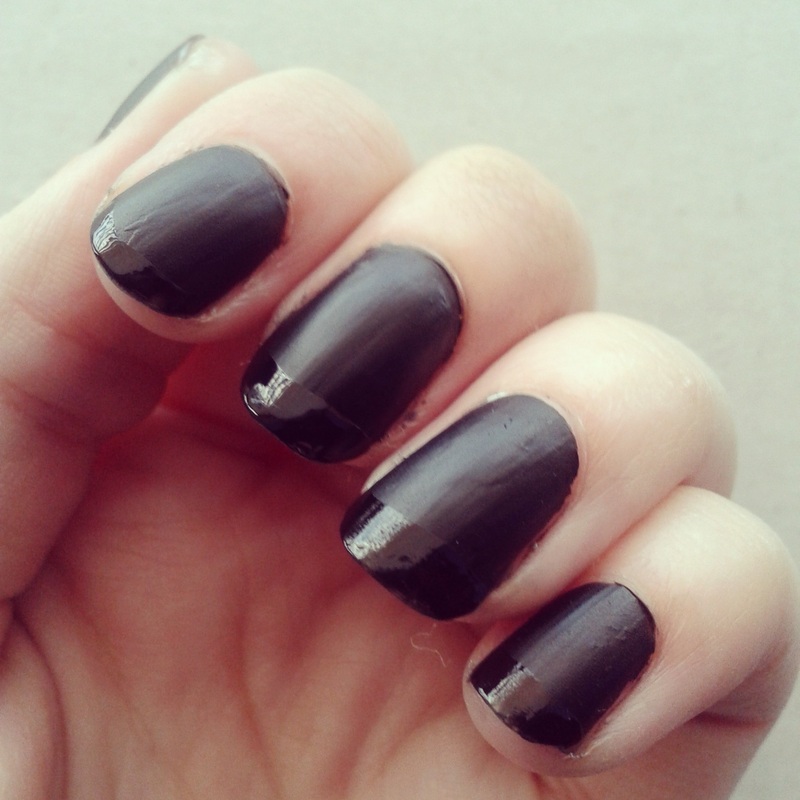
MOCHA
The first one I tried was the Mocha, and I will say that it looks a bit muddy when going on. This colour does need a few coats to get the perfect covering but it dries really fast!
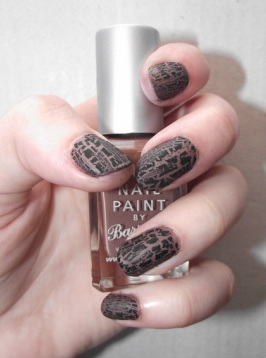
I didn't want to try a shiny tip manicure with the brown, so I decided to go for something different ... I went for Barry M Crackle Nail Effects and I have to say, I haven't got a clue why I didn't think of this before! They look great! As the crackle nail effects can only be applied when the nail polish is dry, it worked out really well as I was able to paint both hands in the matte varnish, and then move on to the effects.
I didn't want to try a shiny tip manicure with the brown, so I decided to go for something different ... I went for Barry M Crackle Nail Effects and I have to say, I haven't got a clue why I didn't think of this before! They look great! As the crackle nail effects can only be applied when the nail polish is dry, it worked out really well as I was able to paint both hands in the matte varnish, and then move on to the effects.
|
|
I used a couple of strokes of this nail polish, but the results are truly effective! They kinda remind me of a giraffe pattern! The matte base colour is very very effective because it doesn't make the nail look too fussy with the crackle. I was so pleased with these results. It's a very simple yet extremely effective design which you don't need to be a nail art pro to do!
|
|
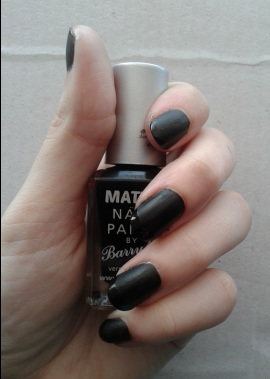
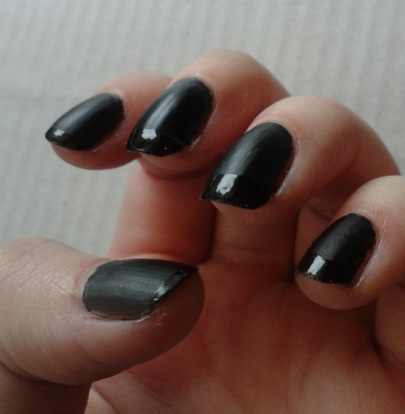
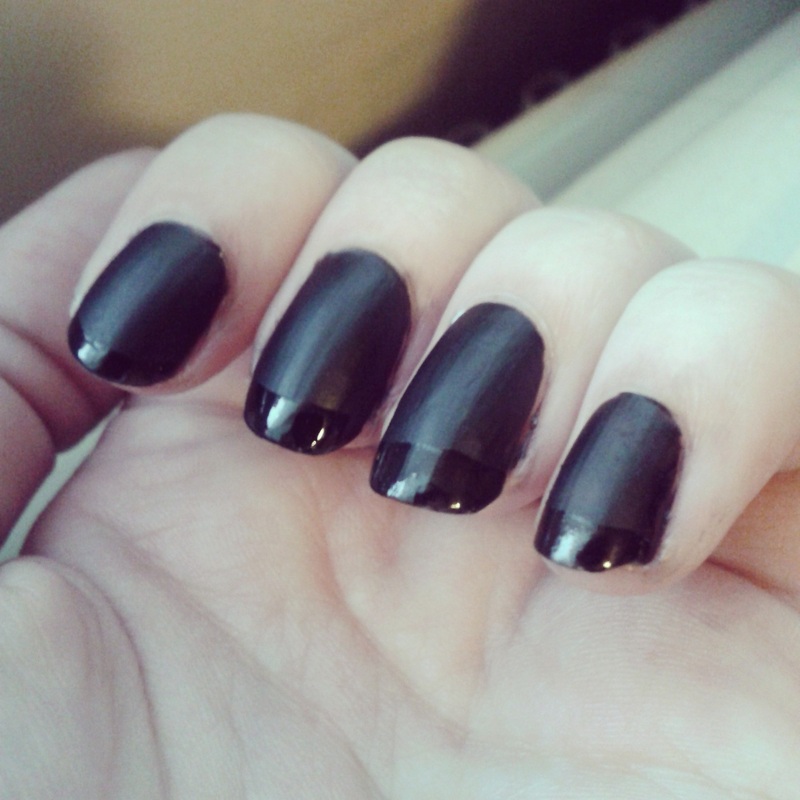
espresso
The second one I tried was the Espresso. I do have to say that this needed a couple of coats to get a jet black colour. I couldn't really do much with the black as it's such a dark colour so felt I was a bit limited, especially as you'd only be able to see the pattern in a certain light. Anyway I tried a couple of things and I eventually went for the shiny tip manicure as I thought it would really be brought out on the black. The Matte polish went on smoothly and it also dries very smooth as well so your nails are super soft. I didn't have any striping tape on me at the time, as I was too eager to wait so I went ahead and tried to do it with the tools I already had.
|
|
I don't actually think it turned out too shabby either! Usually, the method for the shiny tip nail is to paint your nail the desired colour, put some striping tape on the tip of your nails and then paint a Matte Top Coat over the remainder of your nails, removing the tape once it's dry so it reveals the shiny tip. I cheated with this and I think that it was a much easier way to do it!
I used the Barry M Matte Nail Polish on my entire nail and once that was dry, I painted the tips using a fast drying top coat. The top coat meant that the polish dried shiny and the colour didn't change! I was very pleased with these results and I think (hope) I managed to get the manicure fairly straight on the tips.
Black is an awkward colour though, as it brings out ALL of the flaws, so my manicure isn't perfect up close! :o
|
|
Thanks for reading! :) Please feel free to leave comments and suggestions below.
You can check out the tutorial for both of these manicures, HERE!
You can check out the tutorial for both of these manicures, HERE!
HTML Comment Box is loading comments...
