how to do ... matte nails!
Matte Nails are very popular right now, so I thought I would give them a go! You can see a mini review of the two polishes I used HERE. Below, I show you how I created my matte designs. They're very simple and you don't need many tools or polishes! I will be showing you use of 2 polishes: Mocha and Espresso. I hope you like them! :) p.s sorry for the bad lighting, the sun went in way too quickly :(
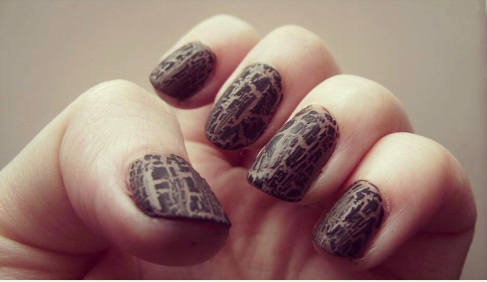
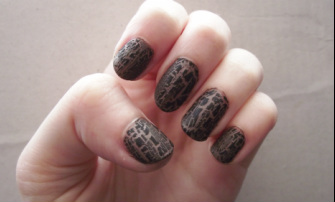
MATTE IN MOCHA
|
|
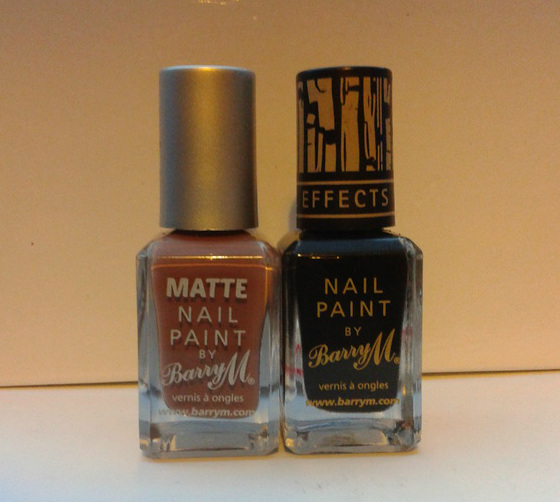
Nail polishes used: Barry M Matte Varnish in Mocha
Barry M Crackle Nail Effects in Black
Barry M Crackle Nail Effects in Black
... And begin!
|
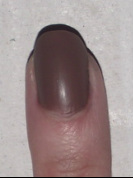
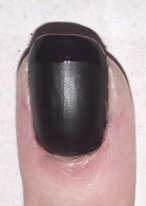
Step 1. Paint your nails with Barry M Matte Varnish in Mocha. |
|
|
Step 2. Go over the polish again as it needs a good coating! |
|
|
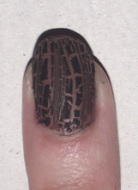
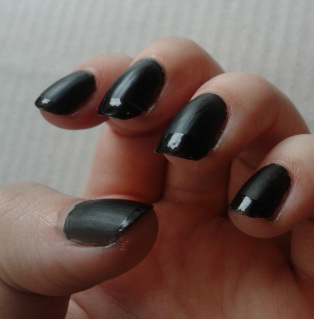
Step 3. Once dry, go over the polish with Barry M Crackle Effect in Black. Go over any bits which you may have missed on your nail. |
|
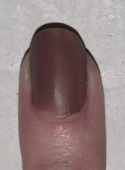
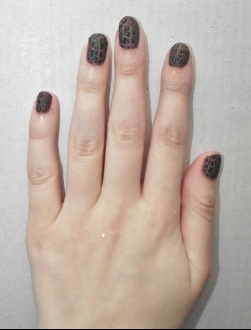
Step 4. Finish off your manicure with a tidy up around your nails!
Don't forget: DO NOT use a top coat on this as it will ruin the Matte Effect! :o
Don't forget: DO NOT use a top coat on this as it will ruin the Matte Effect! :o
|

|
I hope you enjoyed this tutoria! :) Please keep reading for my Espresso Tutorial!
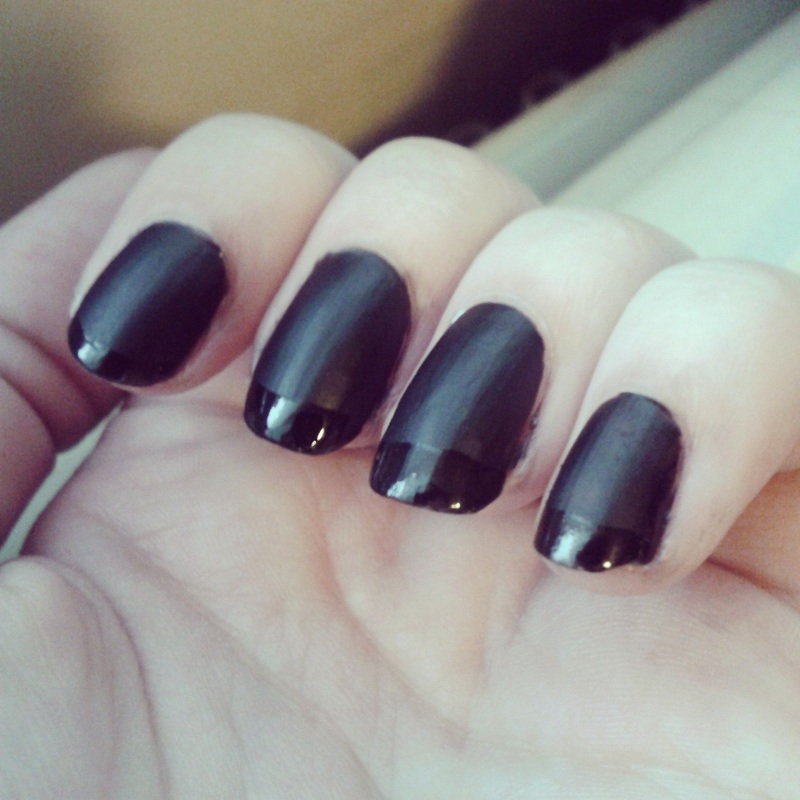
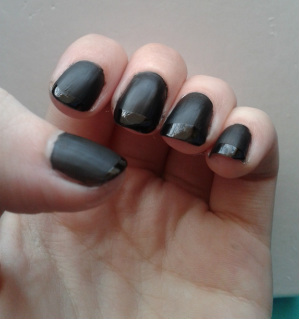
MATTE IN ESPRESSO
|
|
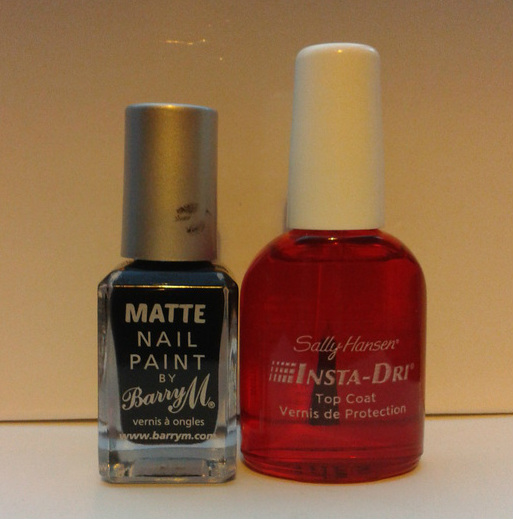
Nail Polishes Used: Barry M Matte Varnish in Espresso
Sally Hansen Insta-Dri Top Coat
Sally Hansen Insta-Dri Top Coat
... And begin!
|
Step 1. Paint your nails in Barry M Matte Varnish in Espresso. |
|
|
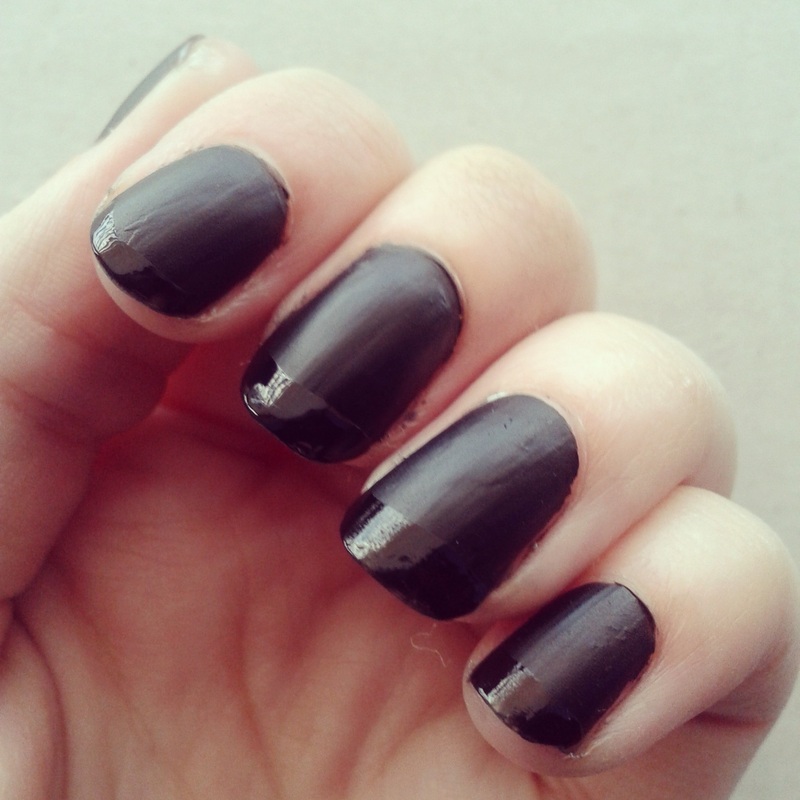
Step 2. Go over the Espresso again, to get a jet black colour. (It looks shiny because I was being impatient :O, but it dries a lovely Matte!) |
|
|
Step 3. Using a top coat (preferably a quick dry one), go over the tips of your nails. It only needs one stroke with quite a bit of polish on, but if you're worried about painting a wonky line you could use striping tape :)
One stroke is all it really needs but you can go over it to make it extra shiny like I did. |
|
|
|
I hope you enjoyed this tutorial! :)
Please feel free to leave your comments and suggestions below!
HTML Comment Box is loading comments...
