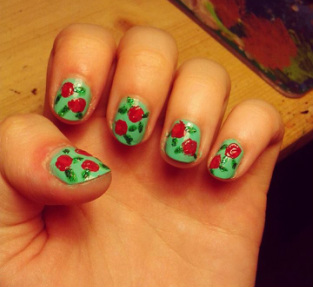
Rose Nail Art - pattern Number 1
This Rose Design proved to be a challenging one for me, as it was my first attempt. They did take a long time to do, but don't let that put you off as the results are totally worth it! This tutorial is an example of my very first attempt at a Rose Design so they aren't the best looking roses but I think I gave it a good go! :) You don't need many tools either which is an advantage! See below how I created the design.
|
|
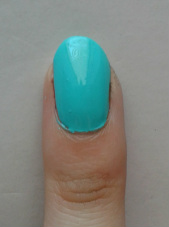
Nail polishes used: Barry M Gelly Hi Shine Nail Polish in Greenberry
RImmel 60 Second Nail Polish in Coralicious
Rimmel 60 Second Nail Polish in Rapid Ruby
Glittery Nail Art Polish in Green
Sally Hansen Insta-Dri Top Coat
Tools Used: Dotting Tool
Paintbrush
RImmel 60 Second Nail Polish in Coralicious
Rimmel 60 Second Nail Polish in Rapid Ruby
Glittery Nail Art Polish in Green
Sally Hansen Insta-Dri Top Coat
Tools Used: Dotting Tool
Paintbrush
.... And begin!
|
Step 1. Paint your nails in Barry M Gelly Hi Shine Nail Polish in Green Berry. The colour here looks a lot different from the above pictures as these were taken in natural light, where as the finished product was taken in bad lighting at night :( |
|
|
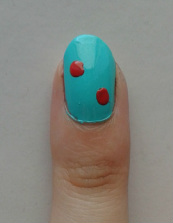
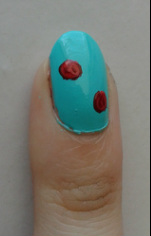
Step 2. Using a dotting tool and Rimmels 60 Second Nail Polish in Coralicious, create two dots anywhere on your nail. I did them in the top left and bottom right so I could space it out a bit. (You can make your dots however big you want to - it all depends on how big you want the rose to be!) My pictures at the beginning of this tutorial show a bigger version of the rose, as opposed to the picture on the right which is aiming towards smaller roses. |
|
|
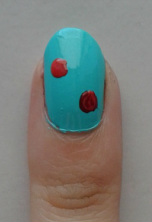
Step 4. Now, using your paintbrush and Rimmels 60 Second Nail Polish in Rapid Ruby, create a rose shape around the first dot.
I created the shape by outlining the dot on the left and right side, leaving a little gap at the top and bottom, and then painting 'C' shaped in the middle. |
|
|
|
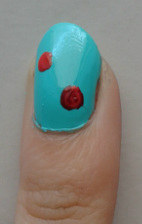
Step 5. Repeat this for the remaining dot. using the same process. |
|
|
|
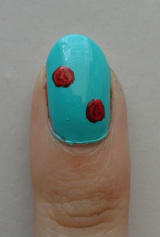
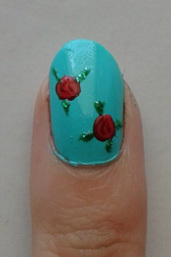
Step 6. Finally, using a green glitter pen or poilish, create leaves around the rose. You will only need one stroke for this as the leaves don't need to be too detailed or fancy. Space them out however you think they should be. |
|
Step 7. Finish off using a top coat and a tidy up and you have finished roses!
|
|
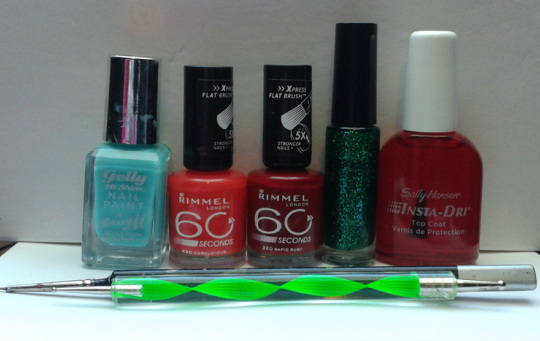
(L,R) Barry M Gelly Hi Shine in Greenberry, Rimmel 60 Second Nail Polish in Coralicious, Rimmel 60 Second Nail Polish in Rapid Ruby, Green Glitter Nail Art Polish, Sally Hansen Insta-Dri Top Coat
I hope you enjoyed this tutorial! :)
Please feel free to leave your comments and suggestions below!
Please feel free to leave your comments and suggestions below!
HTML Comment Box is loading comments...
